Getting Started
The Ware2Go REST APIs provide an easy way for you to integrate Ware2Go's capabilities into your app and to streamline the way that you send and receive data from Ware2Go.
Create a Ware2Go AccountYou must be an active W2G merchant before you can start working with the Ware2Go API. If you don't have an account, go to AccountVu and select Sign Up in the upper right corner.
Once you have a Ware2Go account and can access AccountVu, follow the steps on this page to Add an API User and Get Your API Keys and find your Ware2Go Merchant ID. You use your API credentials and merchant ID to authenticate your requests to the APIs.
Once you have your credentials, see the guides for setting up webhooks, authenticating your API requests, and using the API to create an outbound order for details about using the Ware2Go APIs for your integration.
Add an API User and Get Your API Keys
Follow the steps below to use AccountVu to create an API user and get your API keys:
-
Log in to FulfillmentVu.
-
Add an API user, by clicking the circular profile icon in the upper right hand corner and selecting "API Users":

If you do not have any existing API users, continue with the next steps to add a new API user.
-
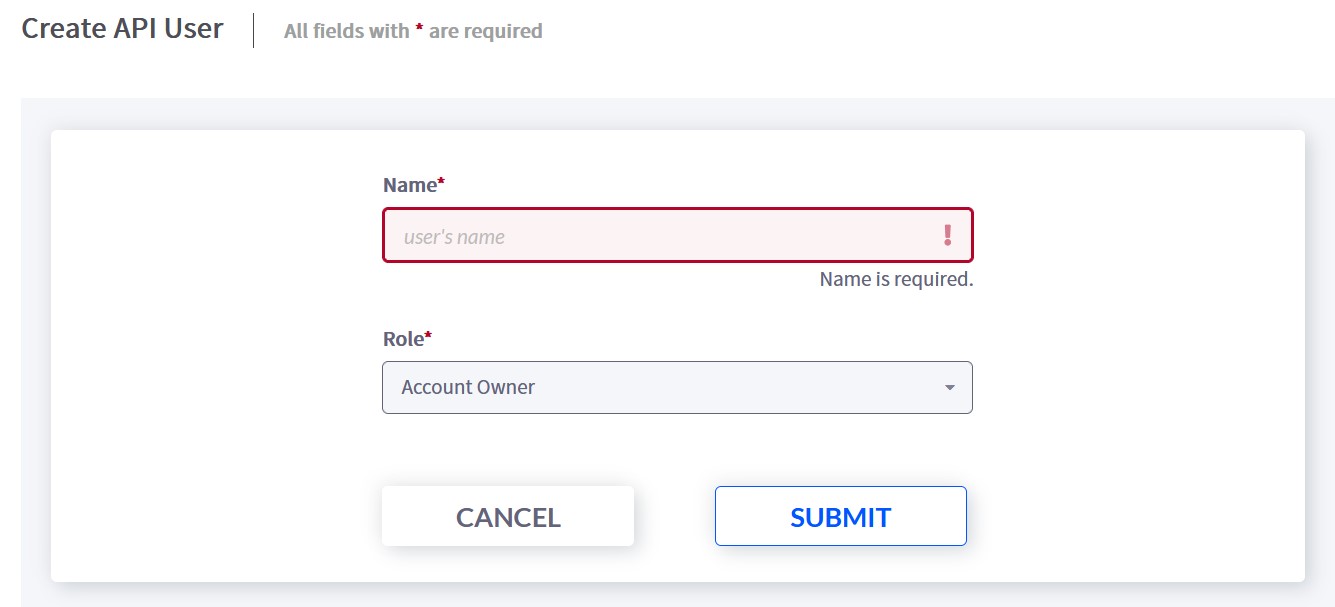
Click the + Add New API User button in the upper right corner. The Create API User form will open:

-
Fill in the Name, select a role from the Role dropdown, and click Submit. The name can only contain alphanumeric characters and the following special characters:
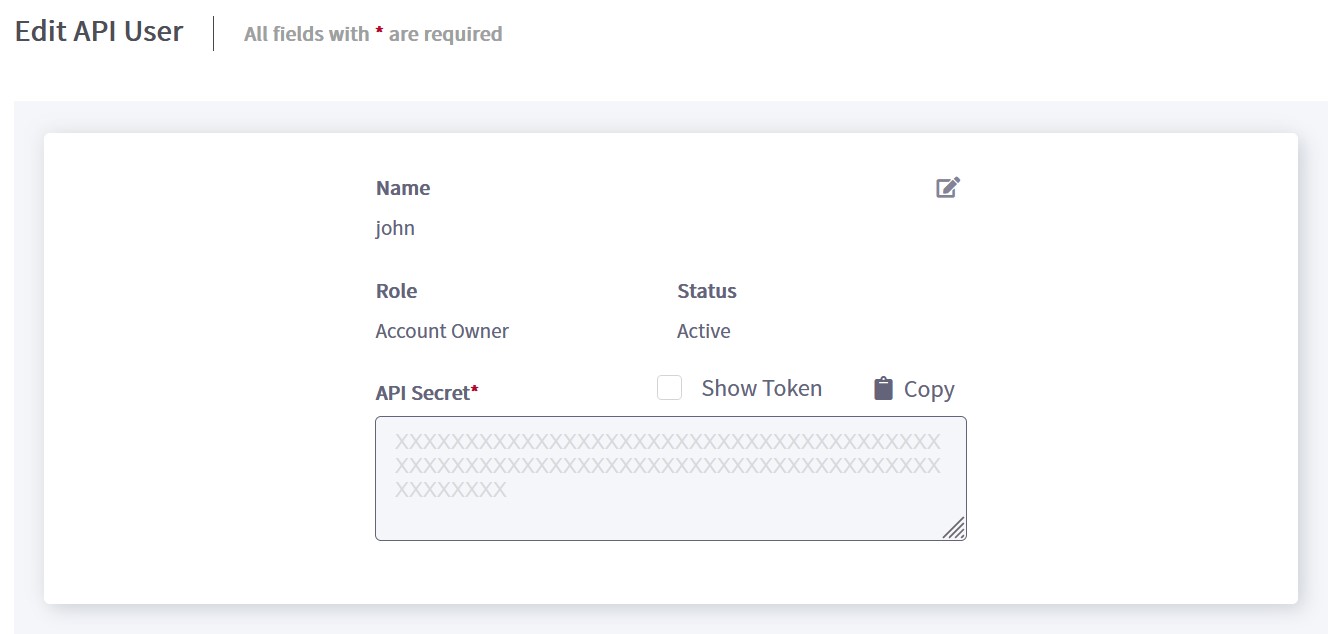
.-_+@. In this case, all roles have the same permissions.The Edit API User screen opens:

-
Select the check box for Show Token to view the API Secret, or click Copy to copy the API Secret to your clipboard.
The API user name and the API secret are used to create a bearer token.
Find your merchant ID
To locate your merchant ID, log in to FulfillmentVu, click the circular profile icon in the upper right corner and select Merchant Profile. The Merchant Profile screen opens. The merchant ID that you will need to use in API requests is highlighted in red in the image below:

Updated 5 months ago
